

Despite the fact that more and more applications are being moved to the web, there is a still high demand of developing desktop applications. That is because web applications still have some limitations (e.g., file system access, a separate window with its taskbar and system tray icons) and cannot replace desktop applications completely.
Electron framework allows you to create a cross-platform (Windows, MacOS, Linux) desktop applications with conventional web technologies – HTML, JavaScript and CSS. Under the hood, it uses Chromium browser’s engine and Node.js runtime. So, if you are familiar with web technologies and want to create a desktop application or even if you already have a web application, but want to have a desktop version of it, Electron enables you to do that efficiently.
Since we can use standard web technologies for developing a desktop Electron app, why not use Angular instead of plain HTML, JavaScript, and CSS? That way we will benefit from Angular pros like enhanced HTML (conditions, loops, variables), data binding and reusable components.
In this article, you will learn how to create and configure a new desktop application with Angular and Electron.
INSTALL PREREQUISITES
To be able to create Electron-Angular application you need to have Node.js and npm installed on your computer. You can download Node.js from here. I recommend to update Node.js and npm to the latest version even if you already have them installed.
The command to update npm to the latest version:
npm install -g npmInstall (or update) Angular CLI globally:
npm install -g @angular/cliCREATE A NEW ANGULAR APPLICATION
Create a new Angular application using Angular CLI.
ng new ng-electron-appReplace ng-electron-app with your application name.
MODIFY INDEX.HTML
Modify base href in the src/index.html file – replace “/” by “./”. Since we are developing a desktop app, we are working in the local file system. Therefore, we need to use “./”, which means that Angular will look for resource files in the application root directory. If we don’t change the base href Angular will try to look for the resource files in the root folder of the disk (in Windows OS case this is usually “c:\”).
<base href="./">Modify the title too. This will be the title of the application window.
<html lang="en">
<head>
  <meta charset="utf-8">
  <title>Angular Electron App</title>
  <base href="./">

  <meta name="viewport" content="width=device-width, initial-scale=1">
  <link rel="icon" type="image/x-icon" href="favicon.ico">
</head>
<body>
  <app-root></app-root>
</body>
</html>
CHECK IF IT WORKS
Run ng build command in the root directory of your app.
ng build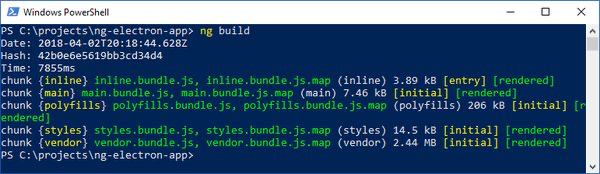
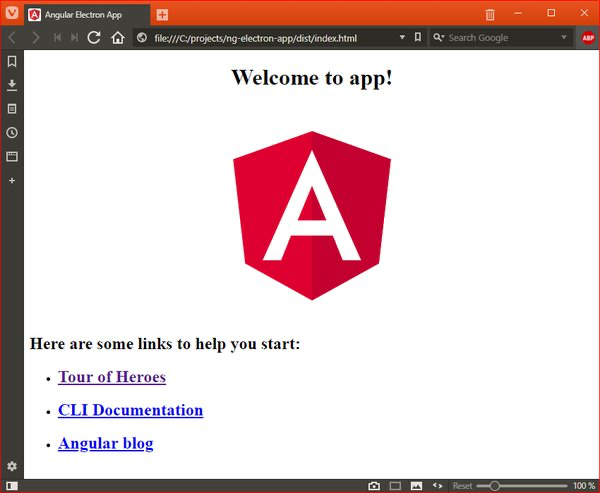
Open dist/index.html in your browser. If everything is fine you should see something like this:
INSTALL ELECTRON PACKAGE
Install electron npm package locally. To do that in the root directory of the project run:
npm install electron@latest --save-dev
The –save-dev flag adds the electron dependency to the devDependecies array in the package.json file.
CREATE ELECTRON’S MAIN FILE
In the root of your application create folder named electron. In this folder create main.ts file. This file the entry point of the Electron application. This file is responsible for managing application’s windows and handling of system events.
You can copy the main.ts file contents from the Electron Quick Start Git repository:
https://github.com/electron/electron-quick-start-typescript/blob/master/src/main.ts
After compilation (do not compile anything yet!) of the app both main.js (compiled main.ts) and index.html file will be in the same directory – dist, therefore we need to modify the path to the index.html in the just created main.ts file:
pathname: path.join(__dirname, 'index.html'),The full contents of the electron/main.ts:
import { app, BrowserWindow } from 'electron';
import * as path from 'path';
import * as url from 'url';

let mainWindow: Electron.BrowserWindow;

function createWindow() {
  // Create the browser window.
  mainWindow = new BrowserWindow({
    height: 600,
    width: 800,
  });

  // and load the index.html of the app.
  mainWindow.loadURL(url.format({
      pathname: path.join(__dirname, 'index.html'),
      protocol: 'file:',
      slashes: true,
  }));

  // Open the DevTools.
  mainWindow.webContents.openDevTools();

  // Emitted when the window is closed.
  mainWindow.on('closed', () => {
    // Dereference the window object, usually you would store windows
    // in an array if your app supports multi windows, this is the time
    // when you should delete the corresponding element.
    mainWindow = null;
  });
}

// This method will be called when Electron has finished
// initialization and is ready to create browser windows.
// Some APIs can only be used after this event occurs.
app.on('ready', createWindow);

// Quit when all windows are closed.
app.on('window-all-closed', () => {
  // On OS X it is common for applications and their menu bar
  // to stay active until the user quits explicitly with Cmd + Q
  if (process.platform !== 'darwin') {
    app.quit();
  }
});

app.on('activate', () => {
  // On OS X it's common to re-create a window in the app when the
  // dock icon is clicked and there are no other windows open.
  if (mainWindow === null) {
    createWindow();
  }
});

// In this file you can include the rest of your app's specific main process
// code. You can also put them in separate files and require them here.
ADD ELECTRON BUILD COMMANDS
We need a convenient way to compile both Angular and Electron applications and then run our Electron application. We can do this by appending scripts section of the package.json file with electron-build and electron-build-prod commands:
"scripts": {
    "ng": "ng",
    "start": "ng serve",
    "build": "ng build --prod",
    "test": "ng test",
    "lint": "ng lint",
    "e2e": "ng e2e",
    "electron-build": "ng build && tsc electron/main.ts --outDir dist -t es5 && electron ./dist/main.js",
    "electron-build-prod": "ng build --prod && tsc electron/main.ts --outDir dist -t es5 && electron ./dist/main.js"
  },
The only difference between these commands is that electron-build-prod command uses ng build –prod command to compile the Angular app. The production build does stuff like bundling, minification, uglification, etc. and it takes longer time to compile the app. I recommend to use it only when needed. The electron-build command will compile the app much faster and is sufficient for the quick checking of the changes you’ve made.
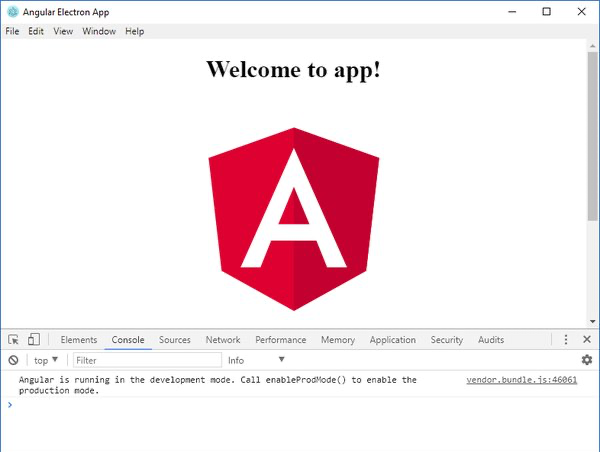
RUN THE APPLICATION
Run electron-build command.
npm run electron-buildAfter compilation is finished, the application should start.
CONCLUSION
We have successfully created and configured Electron-Angular desktop application. From this point, you can add new components, services, configure application menus, etc. In the next article we will learn how to access the file system using Node.js from your Angular app.