

In the previous article we created and configured a basic Electron-Angular application. Now it’s time to extend it and build a real application. In this article you will learn how to add Angular components and services to your desktop application, and access Node.js modules from the application.
IDEA – IMAGE GALLERY APPLICATION
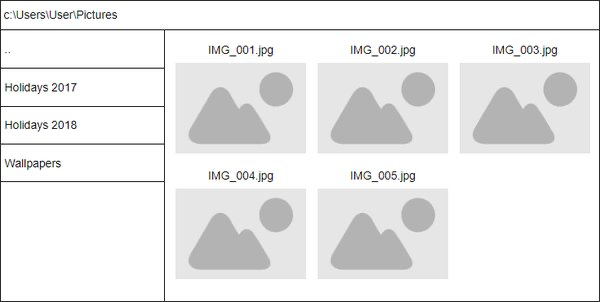
Let’s build a simple image gallery app. On the left side of the window it should contain a directory explorer, which will allow you to browse your local file system’s directories. On the top it will display the path of the selected directory. And, finally, on the right side it will display thumbnails of the selected directory’s images.
INSTALL AND CONFIGURE ANGULAR MATERIAL
We don’t want to spend too much time on styling and on creating nice looking components. Here is where Angular Material library comes to help us. The Angular Material library provides multiple components that comply with Material Design specifications. To install Angular Material and its dependencies, run the following command in the root directory of the project:
npm install --save @angular/material @angular/cdk @angular/animations hammerjsAdd hammerjs import statement to the src/main.ts:
import 'hammerjs';Add BrowserAnimationsModule to the imports array in the app.module.ts (don’t forget to add import statement):
import { BrowserAnimationsModule } from '@angular/platform-browser/animations';
import { BrowserModule } from '@angular/platform-browser';
import { NgModule } from '@angular/core';

import { AppComponent } from './app.component';


@NgModule({
  declarations: [
    AppComponent
  ],
  imports: [
    BrowserModule,
    BrowserAnimationsModule
  ],
  providers: [],
  bootstrap: [AppComponent]
})
export class AppModule { }
Import Angular material theme. Add the following import statement to the src/styles.css file:
@import "~@angular/material/prebuilt-themes/indigo-pink.css";We will need to display some icons (e.g. folder icon). Include Material Icons font to the head section of the src/index.html file:
<link href="https://fonts.googleapis.com/icon?family=Material+Icons" rel="stylesheet">CONFIGURE SASS SUPPORT
Angular allows us to use Sass (Syntactically awesome style sheets) as style files. Sass extends regular CSS with variable declaration, style nesting, loops, and other cool stuff. We will use .scss syntax. To configure SASS support, do the following steps.
Rename global styles file src/styles.css to src/styles.scss.
Modify style file extension in .angular-cli.json:
"styles": [
  "styles.scss"
],
In the same file change default style file extension from css to scss:
"defaults": {
  "styleExt": "scss",
  "component": {}
}
Rename src/app/app.component.css file to src/app/app.component.scss.
Make sure that in src/app/app.component.ts file in the annotation of the component the extension is also changed to scss:
@Component({
  selector: 'app-root',
  templateUrl: './app.component.html',
  styleUrls: ['./app.component.scss']
})
Some IDEs (e.g. WebStorm) do that automatically for you when you rename the file.
CREATE INITIAL LAYOUT
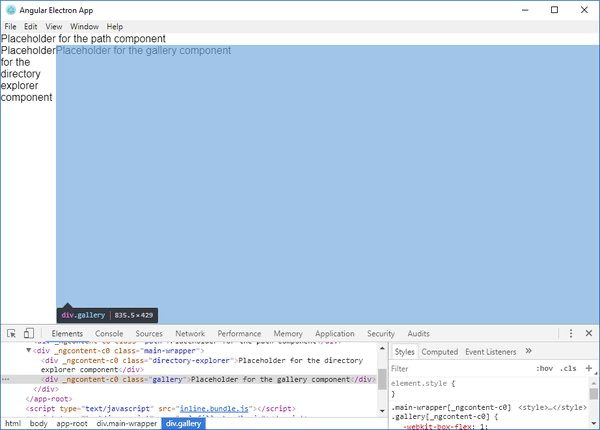
The application’s main layout will consist of three components: path component on the top, directory explorer on the left, and gallery component. Clear all existing contents of src/app/app.component.html and create placeholders for these components:
<div class="path">Placeholder for the path component</div>
<div class="main-wrapper">
  <div class="directory-explorer">Placeholder for the directory explorer component</div>
  <div class="gallery">Placeholder for the gallery component</div>
</div>
We will use Flexbox layout to align the components. Add styles to src/app/app.component.scss:
:host {
  display: flex;
  flex-direction: column;
  height: 100%;
}

.path {
  flex: 0;
}

.main-wrapper {
  flex: 1;
  display: flex;
  flex-direction: row;

  .directory-explorer {
    flex: 0;
  }

  .gallery {
    flex: 1;
    overflow-y: auto;
  }
}
Add global styles to src/styles.scss:
html, body {
  height: 100%;
  padding: 0;
  margin: 0;
  font-family: sans-serif;
}
Recompile the app to see the results.
npm run electron-buildYou can use developer’s console to check if components are properly aligned.
CONFIGURE ACCESS TO NODE.JS MODULES FROM ANGULAR
Our desktop application consists of two applications – Electron application and Angular application. Electron application allows you to use Node.js modules which help to access file system, execute external processes, retrieve OS related information, and much more. Angular CLI doesn’t properly compile an Angular app if you use Node.js directly from the app. But there is a workaround for solving this problem – create a separate JavaScript file where you import needed modules and include them to the build through .angular-cli.json file.
Create src/js folder. In this folder create modules.js file and add the following contents to it:
window.NODE_FS = require('fs');
window.NODE_PATH = require('path');
window.NODE_OS = require('os');
As you can see from the code we will use three modules fs, path, and os. The fs module provides methods for working the file system (e.g. read file). The path module contains utility methods for working with file paths (e.g. combining paths). The os module has operating system-related utilities (e.g. getting the home directory of the current user).
Add the js/modules.js file to the global scripts array in the .angular-cli.json file.
"scripts": [
  "js/modules.js"
],
Now we need to access these modules from the Angular app. To do that, we will create an Angular service called RequiredModulesService. Run this command in the root of the application’s root directory:
ng g service services/required-modulesOutside the generated class (ReqiredModulesService) in the src/app/services/required-modules.service.ts, add function to access the global browser window object:
function _window(): any {
  // return the global browser window object
  return window;
}
Inside the ReqiredModulesService class, declare browserWindow property, which will just call _window() function in its getter:
get browserWindow(): any {
  return _window();
}
This is a workaround for accessing window object from an Angular service.
And, finally, add wrapper properties for variables of our imported modules:
get fs(): any {
  return this.browserWindow.NODE_FS;
}

get os(): any {
  return this.browserWindow.NODE_OS;
}

get path(): any {
  return this.browserWindow.NODE_PATH;
}
The full contents of src/app/services/required-modules.service.ts:
import { Injectable } from '@angular/core';

function _window(): any {
  // return the global browser window object
  return window;
}

@Injectable()
export class RequiredModulesService {

  constructor() { }

  get browserWindow(): any {
    return _window();
  }

  get fs(): any {
    return this.browserWindow.NODE_FS;
  }

  get os(): any {
    return this.browserWindow.NODE_OS;
  }

  get path(): any {
    return this.browserWindow.NODE_PATH;
  }

}
Add the service to the providers array in the src/app/app.module.ts file:
providers: [
  RequiredModulesService
],
Don’t forget to add the import statement if your IDE didn’t do that automatically:
import { RequiredModulesService } from './services/required-modules.service';CREATE FILEINFO MODEL
Before we start creating other services and components, we need to define a model that will contain file/directory-related information: full path, name, (is it directory or file?), and path in URL format (file://). Let’s call it FileInfo. To create the model run the following command in the root directory of your project:
ng g class models/file-infoThe contents of the src/app/models/file-info.ts file:
export class FileInfo {
  fullPath: string;
  name: string;
  isDirectory: boolean;
  url: string;
}
CREATE FILE SERVICE
Let’s create an Angular service that will be responsible for file system-related operations.
ng g service services/fileAdd the service to the providers array in the src/app/app.module.ts file:
providers: [
  RequiredModulesService,
  FileService
],
Add the import statement if needed:
import { FileService } from './services/file.service';Inject the RequiredModulesService to the just created src/app/services/file.service.ts:
constructor(private requiredModulesService: RequiredModulesService) { }Getting directory contents
We need to write a method that will retrieve the contents of a directory. It should return array of FileInfo objects.
With the help of fs module’s readdir(path, callback) method, we can get a list of the names of the files (and directories). To determine if an item is directory or file we should use fs.lstat(path, callback) method.
As you see, it is common for Node.js module’s methods to return data using callbacks. But the proper Angular way is to use observables. Luckily RxJS has bindNodeCallback(nodeFunction) method for converting a Node.js-style callback to a function that returns observable.
const readDirAsObservable = Observable.bindNodeCallback(
  (path: string, callback: (error: Error, files: string[]) => void) => this.requiredModulesService.fs.readdir(path, callback)
);

const lstatAsObservable = Observable.bindNodeCallback(
  (path: string, callback: (error: Error, stats: any) => void) => this.requiredModulesService.fs.lstat(path, callback)
);
Also we want to merge results of fs.readdir() and fs.lstat(), and later on subscribe just to one Observable that will emit array of FileInfo objects. Since we already declared the observables for the fs module’s functions it is easy now:
readDirAsObservable(directoryPath)
  .flatMap(f => f)
  .mergeMap(f => lstatAsObservable(this.requiredModulesService.path.join(directoryPath, f)).catch(err => Observable.empty())
    .map(s => {
      const fileInfo = new FileInfo();
      fileInfo.fullPath = this.requiredModulesService.path.join(directoryPath, f);
      fileInfo.name = f;
      fileInfo.isDirectory = s.isDirectory();
      fileInfo.url = new URL(`file:///${fileInfo.fullPath}`).href;
      return fileInfo;
    }));
The complete code of the method:
private getDirectoryContents(directoryPath: string): Observable {
  const readDirAsObservable = Observable.bindNodeCallback(
    (path: string, callback: (error: Error, files: string[]) => void) => this.requiredModulesService.fs.readdir(path, callback)
  );

  const lstatAsObservable = Observable.bindNodeCallback(
    (path: string, callback: (error: Error, stats: any) => void) => this.requiredModulesService.fs.lstat(path, callback)
  );

  return readDirAsObservable(directoryPath)
    .flatMap(f => f)
    .mergeMap(f => lstatAsObservable(this.requiredModulesService.path.join(directoryPath, f)).catch(err => Observable.empty())
      .map(s => {
        const fileInfo = new FileInfo();
        fileInfo.fullPath = this.requiredModulesService.path.join(directoryPath, f);
        fileInfo.name = f;
        fileInfo.isDirectory = s.isDirectory();
        fileInfo.url = new URL(`file:///${fileInfo.fullPath}`).href;
        return fileInfo;
    }));
}
We can use this private method for public method that will return only directories and for other method that will return only files which can be filtered by extension.
getDirectories(directoryPath: string): Observable {
  return this.getDirectoryContents(directoryPath).filter(f => f.isDirectory).toArray();
}

getFiles(directoryPath: string, extensions: string[] = []): Observable {
  return this.getDirectoryContents(directoryPath).filter(f => {
    const extension = this.requiredModulesService.path.extname(f.name);
      return extensions.length === 0 ?
        f.isDirectory === false :
        f.isDirectory === false && (extensions.find(e => e === extension) != null);
  }).toArray();
}
In our Directory Explorer component that we will create a bit later, we will want to navigate up from the opened directory by clicking “..” item. Let’s write a method for getting parent directory info for a specified directory:
getUpDirectory(directoryPath: string): FileInfo {
  const upDirectory = this.requiredModulesService.path.join(directoryPath, '..');
  const upDirInfo = new FileInfo();
  upDirInfo.name = '..';
  upDirInfo.fullPath = upDirectory;
  upDirInfo.isDirectory = true;
  return upDirInfo;
}
Also we need a method for determining user’s home directory:
getHomeDirectoryPath(): string {
  return this.requiredModulesService.os.homedir();
}
The full contents of src/app/services/file.service.ts:
import { Injectable } from '@angular/core';
import { RequiredModulesService } from './required-modules.service';
import { Observable } from 'rxjs/Observable';
import { FileInfo } from '../models/file-info';

@Injectable()
export class FileService {

  constructor(private requiredModulesService: RequiredModulesService) { }

  private getDirectoryContents(directoryPath: string): Observable {
    const readDirAsObservable = Observable.bindNodeCallback(
      (path: string, callback: (error: Error, files: string[]) => void) => this.requiredModulesService.fs.readdir(path, callback)
    );

    const lstatAsObservable = Observable.bindNodeCallback(
      (path: string, callback: (error: Error, stats: any) => void) => this.requiredModulesService.fs.lstat(path, callback)
    );

    return readDirAsObservable(directoryPath)
      .flatMap(f => f)
      .mergeMap(f => lstatAsObservable(this.requiredModulesService.path.join(directoryPath, f)).catch(err => Observable.empty())
        .map(s => {
          const fileInfo = new FileInfo();
          fileInfo.fullPath = this.requiredModulesService.path.join(directoryPath, f);
          fileInfo.name = f;
          fileInfo.isDirectory = s.isDirectory();
          fileInfo.url = new URL(`file:///${fileInfo.fullPath}`).href;
          return fileInfo;
      }));
    }

  getDirectories(directoryPath: string): Observable {
    return this.getDirectoryContents(directoryPath).filter(f => f.isDirectory).toArray();
  }

  getFiles(directoryPath: string, extensions: string[] = []): Observable {
    return this.getDirectoryContents(directoryPath).filter(f => {
      const extension = this.requiredModulesService.path.extname(f.name);
        return extensions.length === 0 ?
          f.isDirectory === false :
          f.isDirectory === false && (extensions.find(e => e === extension) != null);
    }).toArray();
  }

  getUpDirectory(directoryPath: string): FileInfo {
    const upDirectory = this.requiredModulesService.path.join(directoryPath, '..');
    const upDirInfo = new FileInfo();
    upDirInfo.name = '..';
    upDirInfo.fullPath = upDirectory;
    upDirInfo.isDirectory = true;
    return upDirInfo;
  }

  getHomeDirectoryPath(): string {
    return this.requiredModulesService.os.homedir();
  }

}
To make RxJS operators work, we need to add their import statements to the src/app/app.module.ts:
import 'rxjs/add/operator/mergeMap';
import 'rxjs/add/operator/map';
import 'rxjs/add/observable/bindNodeCallback';
import 'rxjs/add/operator/toArray';
import 'rxjs/add/operator/catch';
import 'rxjs/add/operator/filter';
import 'rxjs/add/observable/empty';
CREATE DIRECTORY EXPLORER COMPONENT
The Directory Explorer component will be responsible for navigating through directories. Run this command to create the Directory Explorer component:
ng g component components/directory-explorerComponent class
Inject FileService and ChangeDetectorRef to the constructor of DirectoryExplorerComponent class (app/components/directory-explorer/directory-explorer.component.ts):
constructor(private fileService: FileService, private cd: ChangeDetectorRef) { }We will use FileService for retrieving of directory contents. ChangeDetectorRef is needed for component updating workaround because Angular is unable to detect changes after calling Node.js module’s methods.
Declare public directories array in the class. This array will be used to store the contents of a selected directory. It is needed for HTML template.
directories: FileInfo[];Declare output property which will be used for notifying other components that selected path is changed:
@Output()
currentPathChanged: EventEmitter = new EventEmitter();
Add readDirectoryInfo method:
readDirectoryInfo(fileInfo: FileInfo) {
  const upDirectory = this.fileService.getUpDirectory(fileInfo.fullPath);
  this.fileService.getDirectories(fileInfo.fullPath).subscribe(f => {
    const directories = [];
    if (upDirectory.fullPath !== fileInfo.fullPath) {
      directories.push(upDirectory);
    }
    directories.push(...f);
    this.directories = directories;
    this.cd.detectChanges(); // workaround for refreshing the component
    this.currentPathChanged.emit(fileInfo);
  });
}
It uses our previously created FileService to get the contents of a specified directory. It assigns the result to the directories array and adds parent directory item (“..”) to the beginning of the array. Then, the method calls change detector to update the current component, and finally, emits the selected directory (FileInfo object) through the currentPathChanged output.
On first component load (startup) we will set initial directory to the user’s home directory and will call readDirectoryInfo to get its contents.
ngOnInit() {
  const path = this.fileService.getHomeDirectoryPath();
  const fileInfo = new FileInfo();
  fileInfo.fullPath = path;
  this.readDirectoryInfo(fileInfo);
}
We want to read a newly selected directory’s contents when user selects directory in the Directory Explorer component. Add the following directoryClicked method that will be called whenever user clicked (selected) a new directory in the component.
directoryClicked(fileInfo: FileInfo) {
  this.readDirectoryInfo(fileInfo);
}
The full contents of app/components/directory-explorer/directory-explorer.component.ts:
import { Component, OnInit, ChangeDetectorRef, Output, EventEmitter } from '@angular/core';
import { FileInfo } from '../../models/file-info';
import { FileService } from '../../services/file.service';

@Component({
  selector: 'app-directory-explorer',
  templateUrl: './directory-explorer.component.html',
  styleUrls: ['./directory-explorer.component.scss']
})
export class DirectoryExplorerComponent implements OnInit {

  @Output()
  currentPathChanged: EventEmitter = new EventEmitter();

  directories: FileInfo[];

  constructor(private fileService: FileService, private cd: ChangeDetectorRef) { }

  ngOnInit() {
    const path = this.fileService.getHomeDirectoryPath();
    const fileInfo = new FileInfo();
    fileInfo.fullPath = path;
    this.readDirectoryInfo(fileInfo);
  }

  readDirectoryInfo(fileInfo: FileInfo) {
    const upDirectory = this.fileService.getUpDirectory(fileInfo.fullPath);
    this.fileService.getDirectories(fileInfo.fullPath).subscribe(f => {
      const directories = [];
      if (upDirectory.fullPath !== fileInfo.fullPath) {
        directories.push(upDirectory);
      }
      directories.push(...f);
      this.directories = directories;
      this.cd.detectChanges(); // workaround for refreshing the component
      this.currentPathChanged.emit(fileInfo);
    });
  }

  directoryClicked(fileInfo: FileInfo) {
    this.readDirectoryInfo(fileInfo);
  }

}
HTML template
We will use and components from the Angular Material library to display list of directories. In order to use them we need to add MatListModule and MatIconModule to the imports array of the src/app/app.module.ts:
imports: [
  BrowserModule,
  BrowserAnimationsModule,
  MatListModule,
  MatIconModule
],
Check the import statement and add it if needed:
import {MatListModule, MatIconModule} from '@angular/material';Add the following HTML template’s code to the app/components/directory-explorer/directory-explorer.component.html:
<div class="container shadow">
  <mat-list>
    <mat-list-item *ngFor="let directory of directories" (click)="directoryClicked(directory)">
      <mat-icon mat-list-icon class="folder-icon">folder</mat-icon>
      <span mat-line>{{directory.name}}</span>
    </mat-list-item>
  </mat-list>
</div>
Here we display directories as list items with the help of component and ngFor loop. Each list item has click event attached.
Styles
Add the following styles to the src/app/components/directory-explorer/directory-explorer.component.scss file:
.container {
  overflow-y: auto;
  height: 100%;
  min-width: 230px;
}

.folder-icon {
  color: #87cefa;
}

mat-list-item {
  &:hover {
    background-color: transparentize(lightgrey, 0.8);
  }
}
Add, finally, add shadow style and some small style adjustments for the mat-list-item to the global styles file (src/styles.scss):
.shadow {
  box-shadow: 0 3px 1px -2px rgba(0, 0, 0, 0.2), 0 2px 2px 0 rgba(0, 0, 0, 0.14), 0 1px 5px 0 rgba(0, 0, 0, 0.12);
}

app-directory-explorer {
  mat-list-item {
    font-size: 14px !important;
    height: 20px !important;
  }
  .mat-list-item-content {
    padding: 0 !important;

    .mat-list-text {
      padding-left: 5px !important;
    }
  }
}
Add the component to the App component
Now that we created the Directory Explorer component it’s time to add it to the App component. In the src/app/app.component.html replace the placeholder text that we created earlier with tags:
<div class="path">Placeholder for the path component</div>
<div class="main-wrapper">
  <div class="directory-explorer"><app-directory-explorer></app-directory-explorer></div>
  <div class="gallery">Placeholder for the gallery component</div>
</div>
Recompile the app and check if the Directory Explorer component works:
npm run electron-build
CREATE PATH COMPONENT
The Path component is very simple. Its purpose is to display the full path of the directory that we selected in the Directory Explorer component. To create the component run ng g component command:
ng g component components/pathComponent class
Declare Angular input property in the src/app/components/path/path.component.ts:
@Input()
currentPathInfo: FileInfo;
We will provide selected directory’s FileInfo object to this properry from the App component later.
Add currentPath string variable to the class:
currentPath: string;This variable will be used for storing the active directory path in the component class.
Implement OnChanges interface and add ngOnChanges method that just sets the currentPath variable’s value:
ngOnChanges(changes: SimpleChanges) {
  if (changes.currentPathInfo.currentValue == null || changes.currentPathInfo.currentValue === '') {
    this.currentPath = '';
  } else {
    this.currentPath = changes.currentPathInfo.currentValue.fullPath;
  }
}
The method will be called every time when currentPathInfo input property will be changed.
The full contents of the src/app/components/path/path.component.ts:
import { Component, OnInit, Input, SimpleChanges, OnChanges } from '@angular/core';
import { FileInfo } from '../../models/file-info';

@Component({
  selector: 'app-path',
  templateUrl: './path.component.html',
  styleUrls: ['./path.component.scss']
})
export class PathComponent implements OnInit, OnChanges {

  @Input()
  currentPathInfo: FileInfo;

  currentPath: string;

  constructor() { }

  ngOnInit() {
  }

  ngOnChanges(changes: SimpleChanges) {
    if (changes.currentPathInfo.currentValue == null || changes.currentPathInfo.currentValue === '') {
      this.currentPath = '';
    } else {
      this.currentPath = changes.currentPathInfo.currentValue.fullPath;
    }
  }

}
HTML template
In the template (src/app/components/path/path.component.html) we just display currentPath variable which is wrapped to div for applying some styling:
<div class="path shadow">
  {{currentPath}}
</div>
Styles
Add styles for the component itself (:host) and path class to the src/app/components/path/path.component.scss file:
:host {
  display: block;
  background-color: white;
  width: 100%;
}

.path {
  margin: 0.5em;
  padding: 0.5em;
  background-color: #f0f8ff;
  line-height: 0.75em;
}
Add the component to the App component
In the App component’s template (src/app/app.component.html) replace the placeholder text that we created for the path component with the real tag of the component (app-path).
<div class="path">
  <app-path></app-path>
</div>
<div class="main-wrapper">
  <div class="directory-explorer">
    <app-directory-explorer></app-directory-explorer>
  </div>
  <div class="gallery">Placeholder for the gallery component</div>
</div>
Now we need to pass the selected directory from the Directory component to the Path component. We can do this wiring the Directory component’s currentPathChanged output to some method in the AppComponent class.
In the src/app/app.component.ts declare currentPathInfo variable:
currentPathInfo: FileInfo;Inject ChangeDetectorRef to the constructor:
constructor(private changeDetector: ChangeDetectorRef) {}Add currentPathChanged method:
currentPathChanged(fileInfo: FileInfo) {
  this.currentPathInfo = fileInfo;
  this.changeDetector.detectChanges();
}
The method just sets currentPathInfo variable’s value and calls the change detector.
The full contents of src/app/app.component.ts:
import { Component, ChangeDetectorRef } from '@angular/core';
import { FileInfo } from './models/file-info';

@Component({
  selector: 'app-root',
  templateUrl: './app.component.html',
  styleUrls: ['./app.component.scss']
})
export class AppComponent {

  currentPathInfo: FileInfo;

  constructor(private changeDetector: ChangeDetectorRef) {}

  currentPathChanged(fileInfo: FileInfo) {
    this.currentPathInfo = fileInfo;
    this.changeDetector.detectChanges();
  }

}
In the app.component.html wire Directory component’s currentPathChanged output to the currentPathChanged(fileInfo: FileInfo) method in the AppComponent class:
<app-directory-explorer (currentPathChanged)="currentPathChanged($event)"></app-directory-explorer>Also wire the Path component’s currentPathInfo input property to the App component’s currentPathInfo variable:
<app-path [currentPathInfo]="currentPathInfo"></app-path>The full contents of src/app/app.component.html:
<div class="path">
  <app-path [currentPathInfo]="currentPathInfo"></app-path>
</div>
<div class="main-wrapper">
  <div class="directory-explorer">
    <app-directory-explorer (currentPathChanged)="currentPathChanged($event)"></app-directory-explorer>
  </div>
  <div class="gallery">Placeholder for the gallery component</div>
</div>
Recompile the app and see the results:
npm run electron-build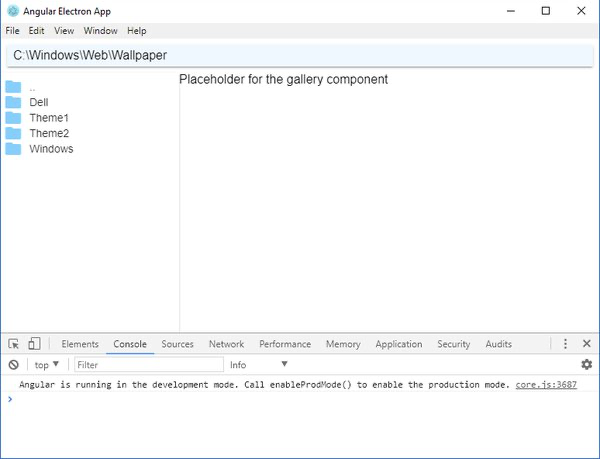
CREATE GALLERY COMPONENT
The Gallery component will display thumbnails of the images of the directory that is selected in the Directory Explorer component. To create the component run the following command:
ng g component components/galleryComponent class
Declare currentPath input property in the src/app/components/gallery/gallery.component.ts:
@Input()
currentPath: string;
Add supportedExtensions string array to store supported file extensions:
supportedExtensions: string[] = ['.png', '.jpg', '.jpeg', '.gif', '.bmp', '.svg'];Also add imageFiles array which will store list of image files to display:
imageFiles: FileInfo[];Inject the File service and ChangeDetectorRef:
constructor(private fileService: FileService, private changeDetector: ChangeDetectorRef) { }Implement OnChanges interface and add ngOnChanges method:
ngOnChanges(changes: SimpleChanges): void {
  if (changes.currentPath.currentValue == null || changes.currentPath.currentValue === '') {
    this.imageFiles = [];
  } else {
    const currentDirectory = changes.currentPath.currentValue;
    this.fileService.getFiles(currentDirectory, this.supportedExtensions).subscribe(f => {
      this.imageFiles = f;
      this.changeDetector.detectChanges();
    });
  }
}
The method calls getFiles method from the FileService and assigns the result to the imageFiles array. The ngOnChanges method is called every time when the currentPath input property is changed.
The full contents of the src/app/components/gallery/gallery.component.ts:
import { Component, OnInit, Input, OnChanges, SimpleChanges, ChangeDetectorRef } from '@angular/core';
import { FileService } from '../../services/file.service';
import { FileInfo } from '../../models/file-info';

@Component({
  selector: 'app-gallery',
  templateUrl: './gallery.component.html',
  styleUrls: ['./gallery.component.scss']
})
export class GalleryComponent implements OnInit, OnChanges {

  @Input()
  currentPath: string;

  supportedExtensions: string[] = ['.png', '.jpg', '.jpeg', '.gif', '.bmp', '.svg'];

  imageFiles: FileInfo[];

  constructor(private fileService: FileService, private changeDetector: ChangeDetectorRef) { }

  ngOnInit() {
  }

  ngOnChanges(changes: SimpleChanges): void {
    if (changes.currentPath.currentValue == null || changes.currentPath.currentValue === '') {
      this.imageFiles = [];
    } else {
      const currentDirectory = changes.currentPath.currentValue;
      this.fileService.getFiles(currentDirectory, this.supportedExtensions).subscribe(f => {
        this.imageFiles = f;
        this.changeDetector.detectChanges();
      });
    }
  }

}
HTML template
We will use component from Angular Material library to display image thumbnails. Therefore, we need to add MatCardModule to the importsarray in the src/app/app.module.ts file:
imports: [
  BrowserModule,
  BrowserAnimationsModule,
  MatListModule,
  MatIconModule,
  MatCardModule
],
Don’t forget to add the import statement for the MatCardModule if needed:
import {MatListModule, MatIconModule, MatCardModule} from '@angular/material';In the HTML template we have ngFor loop through imageFiles array. The represents image file info – file name as a title and thumbnail of the image. The contents of src/app/components/gallery/gallery.component.html:
<div class="container">
  <mat-card *ngFor="let file of imageFiles" class="image-preview">
    <mat-card-header>
      <mat-card-title>{{file.name}}</mat-card-title>
    </mat-card-header>
    <img mat-card-image src="{{file.url}}" alt="{{file.name}}">
  </mat-card>
</div>
Styles
Add these styles to the src/app/components/gallery/gallery.component.scss:
:host {
  height: 100%;
  display: block;
  padding: 0;
}

.container {
  padding: 0.25em 0.5em;
}

.image-preview {
  display: inline-block;
  margin: 0.25em;

  img {
    max-width: 250px;
    max-height: 250px;
  }
}

mat-card-title {
  font-weight: bold;
  text-align: center;
  width: 100%;
}
Add the component to the App component
In the src/app/app.component.html replace the placeholder text for the gallery component with the Gallery component’s tag and pass full path of the selected directory to it through the input property:
<app-gallery [currentPath]="currentPathInfo?.fullPath"></app-gallery>The full contents of src/app/app.component.html:
<div class="path">
  <app-path [currentPathInfo]="currentPathInfo"></app-path>
</div>
<div class="main-wrapper">
  <div class="directory-explorer">
    <app-directory-explorer (currentPathChanged)="currentPathChanged($event)"></app-directory-explorer>
  </div>
  <div class="gallery">
    <app-gallery [currentPath]="currentPathInfo?.fullPath"></app-gallery>
  </div>
</div>
Recompile the app and see the results.
npm run electron-buildNavigate to a folder that contains some pictures and you should be able to see them in the Gallery component.

CONCLUSION
We’ve just created a simple Image Gallery desktop application. You’ve learnt how to add services and components to the application and how to access Node.js modules from the Angular part of the Electron-Angular application. In the next article we will extend our application and will learn how to configure application menu and system tray, and how to call system dialogs.
The source code of this article’s project is available here.